Introduction
Custom patches offer a creative and practical way to personalize clothing, represent teams, promote brands, and express individual style. Whether we want to upgrade everyday outfits, create matching uniforms, build a recognizable brand identity, or design unique accessories, custom patches give us the flexibility to turn our ideas into distinctive designs. From embroidered logos and woven artwork to printed graphics and durable PVC designs, we can choose from different patch styles, materials, shapes, sizes, and backing options to achieve the look we want.
Creating our own custom patches allows us to move beyond ordinary clothing decorations and develop designs that reflect our identity. We can incorporate company logos, team names, personal artwork, meaningful symbols, slogans, and other visual elements. With the right design and manufacturing choices, we can create patches that look professional, complement different fabrics, and remain attractive through regular use.
Custom patches are suitable for individuals, clothing brands, sports teams, schools, clubs, businesses, organizations, and promotional campaigns. They can be applied to jackets, shirts, hats, backpacks, uniforms, workwear, and many other products. Because they are available in various styles and finishes, we can create simple designs for everyday wear or detailed patches for professional branding and team representation.
In this guide, we will explore how to create our own custom patches for clothing and teams, select the right materials, prepare effective designs, choose suitable backing options, and use patches to achieve attractive and long-lasting results.
Why Create Your Own Custom Patches?
Creating our own custom patches gives us greater control over the appearance, message, and purpose of our designs. Instead of choosing standard decorations, we can develop patches that match our preferences, represent our organization, or support a particular clothing collection.
One of the biggest advantages is personalization. We can choose specific colors, lettering, shapes, symbols, and artwork to make every patch meaningful. A sports team might use its mascot and team colors, while a clothing brand might feature a recognizable logo. Individuals can create patches that represent hobbies, interests, favorite designs, or personal achievements.
Custom patches also offer versatility. We can use the same design across different clothing items and accessories, creating a consistent appearance without needing to print an entirely new graphic on every product. This makes patches especially useful for uniforms, branded merchandise, and coordinated team apparel.
Durability is another important consideration. When we select appropriate materials and backing, patches can withstand regular wear and maintain their appearance. The best results depend on the patch construction, garment fabric, application method, and care instructions.
Custom patches can also support creative flexibility. We can experiment with embroidered textures, woven details, smooth printed surfaces, or raised PVC designs. Each option creates a different visual effect, allowing us to match the patch to our intended style.
Ultimately, creating our own patches helps us combine personal expression, visual consistency, and practical functionality in one customizable product.
Understanding Different Types of Custom Patches
Before we begin designing our patches, we should understand the available styles. Each type has distinct characteristics, making it suitable for different applications.
Embroidered Custom Patches
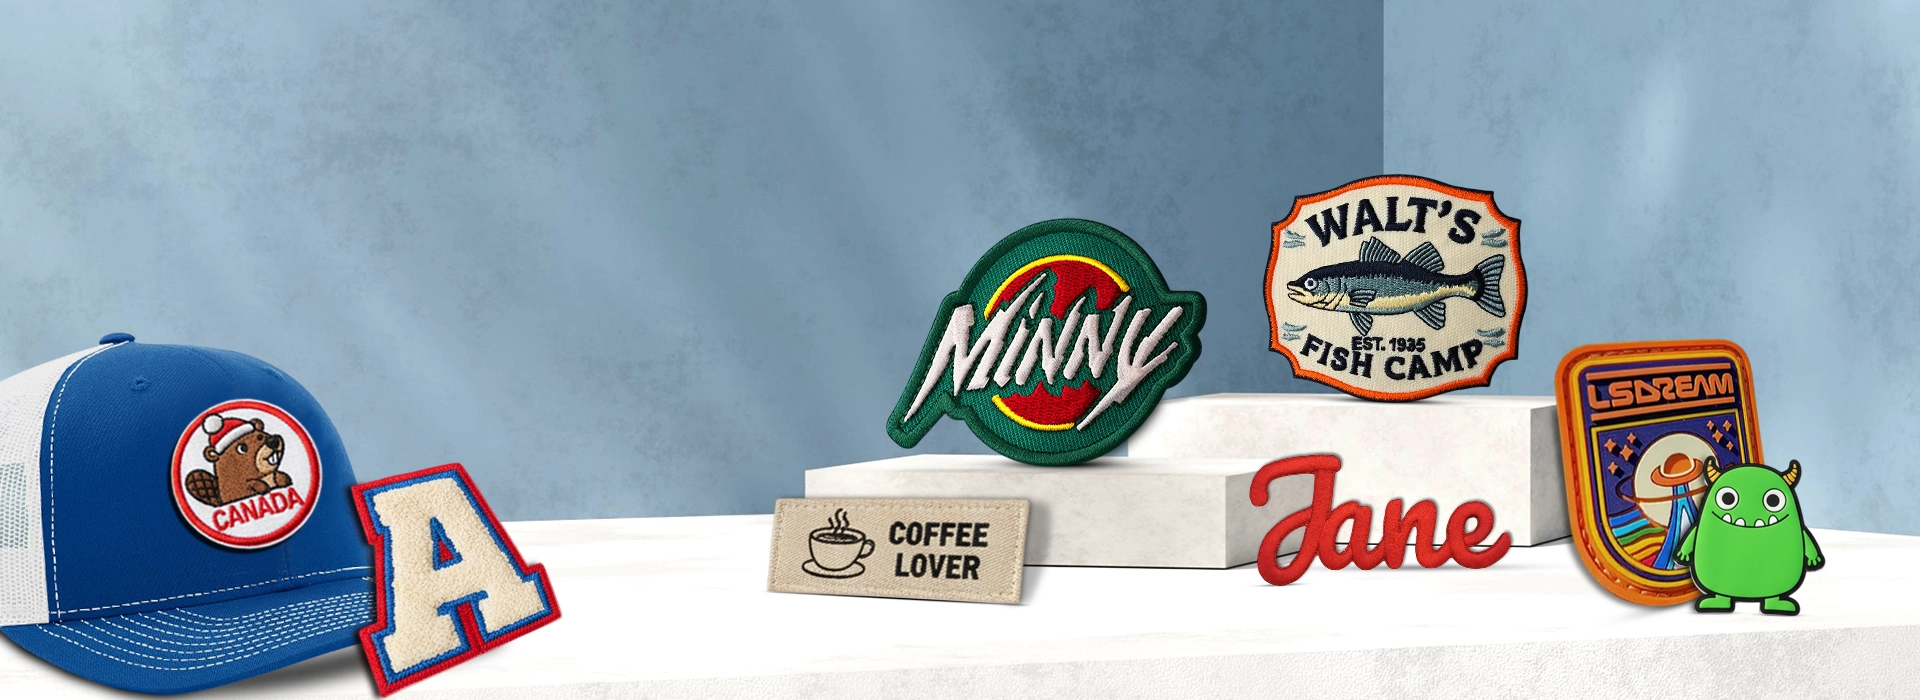
Embroidered patches are a popular choice for clothing, uniforms, jackets, hats, and team apparel. They are created by stitching colored threads onto a fabric base, producing a textured surface that gives designs a traditional and professional appearance.
We can use embroidered patches for logos, names, symbols, badges, and simple illustrations. Their raised stitching adds dimension, helping designs stand out against clothing. They work particularly well when we want a classic appearance that complements denim jackets, workwear, sports clothing, and casual accessories.
However, extremely small lettering and intricate details may not reproduce clearly with embroidery. If our design includes thin lines, tiny text, or complex color transitions, we should simplify the artwork or consider a different patch style.
Embroidered patches are a strong option when texture, recognizable shapes, and a traditional stitched finish are important to our project.
Woven Custom Patches
Woven patches are produced using fine threads woven together to form the design. Unlike embroidered patches, which create a raised stitched surface, woven patches generally have a flatter finish.
This construction allows us to include smaller text, finer lines, and more detailed artwork. Woven patches are especially useful for clothing brands, labels, uniforms, and designs that require precise lettering.
If our logo includes thin outlines, small symbols, or compact typography, woven patches may offer a cleaner result than traditional embroidery. Their relatively smooth surface also makes them suitable for garments where we prefer a subtle finish.
We should still ensure that the artwork remains legible at the final patch size. Even with fine weaving, excessively small details can become difficult to distinguish.
Printed Custom Patches
Printed patches are ideal when our artwork includes gradients, photographic elements, multiple colors, or detailed illustrations. Rather than relying on individual threads to reproduce every feature, printing allows the design to appear on the patch surface.
This makes printed patches useful for modern clothing brands, promotional merchandise, artistic designs, and colorful team graphics. We can reproduce complex visual elements that might be difficult to achieve through embroidery or weaving.
Printed patches may also provide a smooth finish that suits contemporary clothing styles. Their appearance and longevity depend on the printing process, materials, and finishing method used by the manufacturer.
When selecting printed patches, we should ask about color accuracy, wash resistance, and compatibility with our intended garments.
PVC Custom Patches
PVC patches are made from flexible synthetic material and are often associated with a molded, dimensional appearance. They are commonly used for outdoor apparel, tactical-style accessories, backpacks, hats, and sports equipment.
Their structured surface allows us to create raised lettering, recessed details, bold outlines, and layered effects. PVC patches are especially useful when we want a distinctive appearance and a material that handles moisture well.
These patches can suit outdoor teams, recreational clubs, adventure brands, and organizations that need a durable-looking design. However, PVC may not be the right choice for every garment, particularly when a soft, traditional fabric finish is preferred.
We should consider the weight, flexibility, intended use, and attachment method before choosing PVC patches for a specific product.
Chenille Custom Patches
Chenille patches feature a soft, textured surface created with yarn, giving them a thick and distinctive appearance. They are often associated with varsity jackets, school apparel, college-style clothing, and sports team merchandise.
Large letters, numbers, mascots, and simple symbols work especially well with chenille. The texture creates a bold visual effect that makes the design easy to notice.
If we want to create custom patches for school teams, athletic clubs, or fashion collections inspired by varsity clothing, chenille can be an excellent choice.
Because the material is relatively thick, chenille may not be suitable for every garment or intricate design. We should choose artwork that benefits from its soft, raised texture.
Choosing the Right Patch Style for Clothing
When creating custom patches for clothing, we need to consider how the design will look on the garment and how the patch will perform during everyday use.
The fabric is an important starting point. Denim jackets, heavy cotton garments, canvas bags, and sturdy uniforms can often support a wider range of patch constructions. Lightweight shirts and delicate fabrics may require smaller, lighter patches to prevent stretching or an uncomfortable finish.
We should also consider the garment's purpose. A decorative patch for a fashion jacket may prioritize texture and visual appeal, while a patch for workwear may need to remain legible and securely attached through frequent use.
Color coordination matters as well. A patch should complement the clothing rather than compete with it. We can choose contrasting colors for a bold statement or similar shades for a more subtle, coordinated appearance.
Placement can significantly influence the final result. A large patch on the back of a jacket creates a focal point, while a small patch on the chest or sleeve can deliver a cleaner, understated look. On hats, the available space and curved surface should guide our design and size decisions.
We should measure the intended area before ordering. This helps us avoid patches that appear too large, too small, or poorly proportioned once applied.
By matching the patch style to the garment, we can create a finished product that looks intentional, comfortable, and suitable for its intended use.
Designing Custom Patches for Sports Teams
Custom patches are an effective way to build a recognizable identity for sports teams. They can display team names, mascots, numbers, symbols, and other elements that help players and supporters feel connected.
When designing patches for a team, consistency should be one of our main priorities. We should use the official team colors, maintain a recognizable logo, and choose typography that remains easy to read. Repeating the same design across jerseys, jackets, training apparel, and bags helps create a unified appearance.
The team logo should be the central visual element whenever possible. If the logo contains too many details, we can create a simplified version specifically for patches. This preserves the most recognizable features while improving clarity at smaller sizes.
We should also consider the sport and the environment in which the patches will be used. Outdoor teams may benefit from durable materials and secure attachment methods, while indoor teams may prioritize a lightweight finish that works comfortably on their uniforms.
For youth teams, school clubs, and community organizations, custom patches can also represent achievements, membership, participation, or special events. We can create separate designs for team captains, tournament participation, seasonal celebrations, and commemorative occasions.
Before finalizing the design, we should review a digital proof or sample when available. This allows us to check the colors, lettering, dimensions, and overall appearance before producing patches for the entire team.
A well-designed team patch does more than decorate a uniform. It helps establish a shared visual identity and gives players a consistent way to represent their team.
Creating Custom Patches for Clothing Brands
For clothing brands, custom patches can serve as an important part of product identity. A carefully designed patch can make a jacket, hoodie, hat, pair of trousers, or bag more recognizable while supporting a consistent brand image.
We should begin by identifying the visual characteristics that represent our brand. These may include a logo, initials, a symbol, a signature color combination, or a distinctive wordmark. The patch should complement these elements rather than introduce an unrelated style.
The type of patch we choose should reflect the products we sell. Embroidered patches can support heritage-inspired and casual clothing collections. Woven patches can reproduce detailed logos and smaller lettering. Printed patches may suit colorful artwork, while PVC patches can work well with technical or outdoor-inspired apparel.
Placement is another important branding decision. A small patch on the chest, sleeve, or lower hem can create a subtle branded detail. A larger patch on the back of a jacket can become a central design feature. Hats and bags offer additional opportunities to introduce brand graphics.
We should consider how the patch interacts with the rest of the garment. Its size, color, texture, and position should feel balanced with the clothing design. A patch that is too large or visually complicated can overwhelm a simple garment, while a patch that is too small may fail to communicate the brand clearly.
Consistency across products is equally valuable. Using the same patch design or a coordinated family of designs can help customers recognize our brand across different collections.
For businesses launching new clothing lines, custom patches also offer a practical way to test design concepts. We can compare different sizes, colors, and placements before deciding which approach works best for the final collection.
Selecting the Right Size and Shape
Size and shape influence how a custom patch looks and how effectively it communicates its message. We should choose dimensions based on the available garment space, the complexity of the artwork, and the desired visual impact.
Small patches are often suitable for shirt pockets, sleeves, hats, and subtle brand details. Medium-sized patches provide enough room for many logos, names, and symbols without overwhelming the garment. Large patches work well on jacket backs, backpacks, and statement pieces where the design needs to attract attention.
We should not select a size based on appearance alone. The patch must also accommodate its lettering and artwork. If we reduce a detailed logo too much, small text and narrow lines may become difficult to reproduce.
Shape offers another opportunity for personalization. Common options include circles, squares, rectangles, ovals, shields, and custom-cut outlines. A circular patch may suit a club emblem, while a shield shape can create a traditional badge appearance. Rectangular patches often work well for names and wordmarks.
Custom-cut patches can follow the outline of a mascot, logo, or symbol. This can create a more distinctive appearance, although complicated edges may affect manufacturing options and cost.
We should review the proposed patch at its actual size before approving production. Viewing a design only at a large scale on a computer screen may make small details appear clearer than they will be on the finished product.
Choosing Colors, Fonts, and Artwork
An effective patch design depends on more than attractive graphics. We need to ensure that the colors, typography, and visual elements work together at the intended size.
We should begin with a clear visual hierarchy. The most important information, such as a logo or team name, should be easy to identify. Supporting text and decorative details should remain secondary.
Color contrast is essential for readability. Dark lettering on a light background or light lettering on a dark background often produces a clear result. Similar shades can create a subtle appearance, but they may reduce visibility when the patch is viewed from a distance.
We should also limit the number of colors when possible. A focused palette can make a patch look cleaner and more recognizable. However, the ideal number of colors depends on the manufacturing method and the artwork itself.
Typography should match the purpose of the patch. Bold lettering often works well for sports teams and workwear, while more refined fonts may suit fashion brands. Decorative fonts can add personality, but they should not make important words difficult to read.
Artwork should be prepared in a suitable digital format. A high-resolution image or vector file can help the manufacturer reproduce the design accurately. We should provide clear instructions about colors, dimensions, lettering, and any special details.
If our design contains gradients, photographs, very fine lines, or tiny lettering, we should discuss the best production method with the manufacturer before placing an order.
The goal is to create a design that looks good not only on screen but also as a finished physical patch.
Selecting the Best Backing Option
The backing determines how a patch attaches to clothing or accessories. Choosing the right option is important because different garments require different application methods.
Sew-On Backing
Sew-on patches are attached using stitches around the edges or through suitable areas of the patch. This option is often preferred when we want a traditional attachment method for jackets, uniforms, workwear, bags, and other frequently used items.
Sewing can provide a secure attachment when the thread, stitching pattern, patch, and garment are suitable for the application. It is particularly useful when we expect the garment to experience regular wear.
However, sewing requires access to the appropriate equipment or a willingness to attach the patch by hand. We should also consider whether the garment's fabric can support the stitching without damage.
Iron-On Backing
Iron-on patches include a heat-activated adhesive that bonds to compatible fabrics when applied according to the manufacturer's instructions.
This option can make application convenient because we may not need to sew the patch immediately. Iron-on backing is commonly considered for casual clothing, jackets, bags, and decorative projects.
Not every fabric is suitable for heat application. Delicate materials, heat-sensitive synthetic fabrics, coated surfaces, and certain garment finishes may be damaged by high temperatures. We should always check the garment's care label and the patch manufacturer's instructions.
For items that experience frequent washing or heavy use, additional stitching may improve attachment, depending on the materials involved.
Hook-and-Loop Backing
Hook-and-loop backing allows a patch to attach to a compatible surface and be removed when needed. It is often used for tactical-style clothing, outdoor equipment, uniforms, and accessories designed for interchangeable patches.
This option is useful when teams or organizations need to change names, identifiers, or design elements without replacing the entire garment.
We should confirm that both sides of the fastening system are compatible and that the attachment area can support the patch securely.
Adhesive Backing
Adhesive-backed patches may be suitable for temporary decoration, promotional uses, or projects where a simple application is preferred.
However, adhesive performance varies considerably by material and surface. Adhesive backing may not withstand repeated washing, stretching, or heavy use as reliably as sewing or other suitable attachment methods.
We should confirm whether the adhesive is intended for fabric and whether the patch is designed for temporary or long-term use.
How to Create Your Own Custom Patches Step by Step
Creating a custom patch becomes easier when we follow a clear process from the initial idea to the finished product.
Step 1: Define the Purpose
First, we should identify why we need the patches. Are we designing them for personal clothing, a sports team, a clothing brand, a school club, or a promotional campaign?
The intended purpose influences nearly every later decision, including materials, size, design style, and attachment method.
For example, a decorative patch for a denim jacket may prioritize appearance, while a patch for a work uniform may need a professional design and secure attachment.
Step 2: Prepare the Design
Next, we should develop the artwork. We can start with a logo, symbol, name, illustration, or simple concept sketch.
We should keep the design appropriate for the intended size and manufacturing method. Important lettering must remain readable, and decorative details should not make the overall design confusing.
If we are creating patches for a team or business, we should use approved branding elements and confirm that we have permission to use any third-party artwork.
Step 3: Select the Patch Type
Once the design is ready, we can choose between embroidered, woven, printed, PVC, chenille, or another available construction.
Our decision should reflect the visual style, level of detail, garment type, durability requirements, and available budget.
When we are unsure, we can ask the manufacturer to recommend a construction based on our artwork and intended application.
Step 4: Choose the Size and Shape
We should measure the area where the patch will be applied and select dimensions that fit comfortably.
The shape should complement the design. We should also confirm that the final size provides enough room for important text and visual details.
Step 5: Select the Backing
We should choose a backing method that suits the fabric and expected use. Sew-on backing may be suitable for durable, long-term attachment, while iron-on backing can offer convenience for compatible garments.
If the patch needs to be removable, hook-and-loop backing may be a better option.
Step 6: Review the Digital Proof
Before approving production, we should carefully inspect the manufacturer's proof.
We need to check the spelling, logo proportions, colors, border, dimensions, and placement of individual design elements. We should also ask questions about any details that appear unclear.
This stage is important because correcting a design before production is usually easier than addressing an error after the patches have been manufactured.
Step 7: Confirm the Order
Once we approve the design, we can confirm the quantity, production specifications, delivery arrangements, and total cost.
If we are ordering patches for a business or team, we should verify the required quantity and ensure that everyone receives the same approved design.
For larger orders, requesting a sample can help us evaluate the actual materials and finish before proceeding with the full quantity.
Step 8: Apply and Inspect the Patches
After receiving the patches, we should inspect them for consistency and visible defects.
We can then attach them using the selected method and follow the relevant instructions. Correct placement, suitable tools, and careful application help improve the final result.
By following these steps, we can turn an initial concept into a finished patch that meets our design and practical requirements.
Custom Patches for Hats, Bags, and Accessories
Although clothing is a common application, custom patches can also improve the appearance of hats, backpacks, travel bags, and other accessories.
Hats provide a compact space for logos, initials, symbols, and short names. Because the front panels of caps can be curved, we should select a patch size and construction that fit the available area without creating excessive stiffness.
Embroidered and woven patches are popular choices for headwear because they can create a recognizable branded detail. PVC patches may be suitable for outdoor-inspired designs, depending on the hat material and intended style.
Backpacks and bags offer more flexibility in terms of patch size and placement. We can use small patches for subtle branding or larger designs to create a noticeable focal point.
Hook-and-loop panels can be especially useful for bags and equipment that support interchangeable patches. This allows us to change the design without permanently altering the entire item.
We should consider how the accessory will be used. A travel bag may experience abrasion and frequent handling, while a decorative tote bag may require less demanding specifications. The patch material and attachment method should suit those conditions.
By extending our designs to accessories, we can maintain a consistent appearance across clothing, equipment, and promotional merchandise.
Understanding Custom Patch Pricing
The cost of custom patches depends on several factors, so we should evaluate the full design rather than relying on a single price estimate.
Patch size is one of the main considerations. Larger patches generally require more material and may involve additional production work. Design complexity can also affect pricing, particularly when the artwork includes numerous colors, detailed stitching, unusual shapes, or specialized finishes.
The patch construction influences cost as well. Embroidered, woven, printed, PVC, and chenille patches involve different manufacturing processes and materials.
Quantity is another important factor. Some setup costs are distributed across the order, so the per-patch price may decrease when we order more units. However, the total order cost will generally increase with quantity.
Backing and finishing options can also affect the final price. Special borders, metallic threads, raised details, and other custom features may involve additional costs.
Before confirming an order, we should request a complete quotation that explains the unit price, setup charges, shipping costs, applicable taxes, and any other fees.
For teams and clothing businesses, it is useful to compare quotations based on identical specifications. We should make sure that each supplier is quoting the same dimensions, materials, backing, design complexity, and quantity.
The lowest price is not always the best value. We should also consider product consistency, communication, sample quality, production timelines, and the manufacturer's ability to meet our requirements.
Common Mistakes to Avoid When Designing Custom Patches
Even a promising patch concept can produce disappointing results if we overlook important details during the design and ordering process.
One common mistake is including too much information. Small patches have limited space, so long slogans, tiny lettering, and numerous decorative elements can make the design difficult to read. We should prioritize the most important information and remove unnecessary details.
Another mistake is selecting colors without considering contrast. Colors that appear distinct on a computer screen may look similar when reproduced using thread or other materials. We should review the proposed color combinations carefully and request a proof before production.
Choosing the wrong patch construction can also affect the outcome. Detailed logos may require woven or printed production, while bold shapes may work well with embroidery. We should match the manufacturing method to the artwork rather than forcing every design into the same format.
We should also avoid overlooking the garment fabric. A heavy patch may not suit a lightweight shirt, and heat-sensitive materials may not be compatible with iron-on application. Checking the fabric and attachment requirements in advance can prevent damage and improve the result.
Incorrect measurements are another avoidable problem. If we do not measure the intended placement area, the patch may cover seams, interfere with pockets, or look disproportionate. Measuring the garment before ordering helps us select the right dimensions.
Finally, we should never approve a proof without checking the details. Spelling errors, incorrect colors, distorted logos, and inconsistent spacing can all affect the finished product.
Taking time to review the design, materials, dimensions, and application method helps us avoid unnecessary problems and create patches that meet our expectations.
Caring for Clothing with Custom Patches
Proper care helps preserve the appearance of custom patches and the garments to which they are attached.
We should always follow the care instructions provided by the patch manufacturer and the garment label. Different patch materials and adhesives may respond differently to heat, water, detergents, and mechanical stress.
When washing clothing with custom patches, turning the garment inside out can help reduce direct friction against the patch surface. Using a suitable wash cycle and avoiding unnecessarily harsh treatment may also help preserve stitching, printed details, and attachment points.
We should pay attention to heat exposure. High temperatures may affect some adhesives, synthetic materials, and delicate fabrics. If the garment requires ironing, we should avoid applying heat directly to the patch unless the manufacturer confirms that doing so is appropriate.
After washing, we should inspect the patch for loose edges, damaged stitching, fading, or signs that the backing is separating from the garment. Addressing minor problems early may prevent further deterioration.
For frequently worn uniforms and workwear, regular inspection is particularly useful. If a patch begins to detach, we should repair or replace it using an appropriate method rather than continuing to wear it in a condition where it may come loose.
PVC, embroidered, woven, and printed patches may require different care approaches, so we should not assume that one cleaning method suits every material.
With suitable care, we can help our patches remain attractive and functional for longer.
Conclusion
Creating your own custom patches for clothing and teams gives us an effective way to combine personalization, branding, and practical design. Whether we are developing a unique patch for a favorite jacket, creating matching uniforms for a sports team, or adding recognizable details to a clothing collection, custom patches allow us to transform simple garments into products with a distinctive identity.
The best results begin with a clear purpose and a design that reflects our goals. By choosing the right patch type, selecting suitable colors and artwork, measuring the available space, and matching the backing to the garment, we can create patches that look professional and work well for their intended use.
Embroidered patches offer a classic textured finish, woven patches support finer details, printed patches reproduce complex artwork, PVC patches provide a dimensional appearance, and chenille patches deliver a soft, bold texture. Each option has its own advantages, so we should consider the design, fabric, durability requirements, and budget before making a final decision.
We should also pay attention to the production process. Preparing clear artwork, reviewing digital proofs, confirming dimensions, and inspecting samples can help us avoid unnecessary mistakes. Choosing a reliable manufacturer and providing accurate specifications further improves our chances of receiving patches that match our expectations.
For clothing brands and teams, consistency is especially important. Using coordinated designs, recognizable colors, and suitable placement can create a unified appearance across jackets, shirts, hats, bags, and uniforms. For individuals, custom patches provide a flexible way to express creativity and personalize everyday items.
Ultimately, the value of a custom patch comes from how well it combines appearance, quality, and purpose. When we plan our designs carefully and choose materials that suit our needs, we can create custom patches that represent our identity, enhance our clothing, and help our teams and brands stand out.